Magnetic Car Mount Attachment
Couldn't load pickup availability
Product Details
Your Phone Mount for the Open Road.
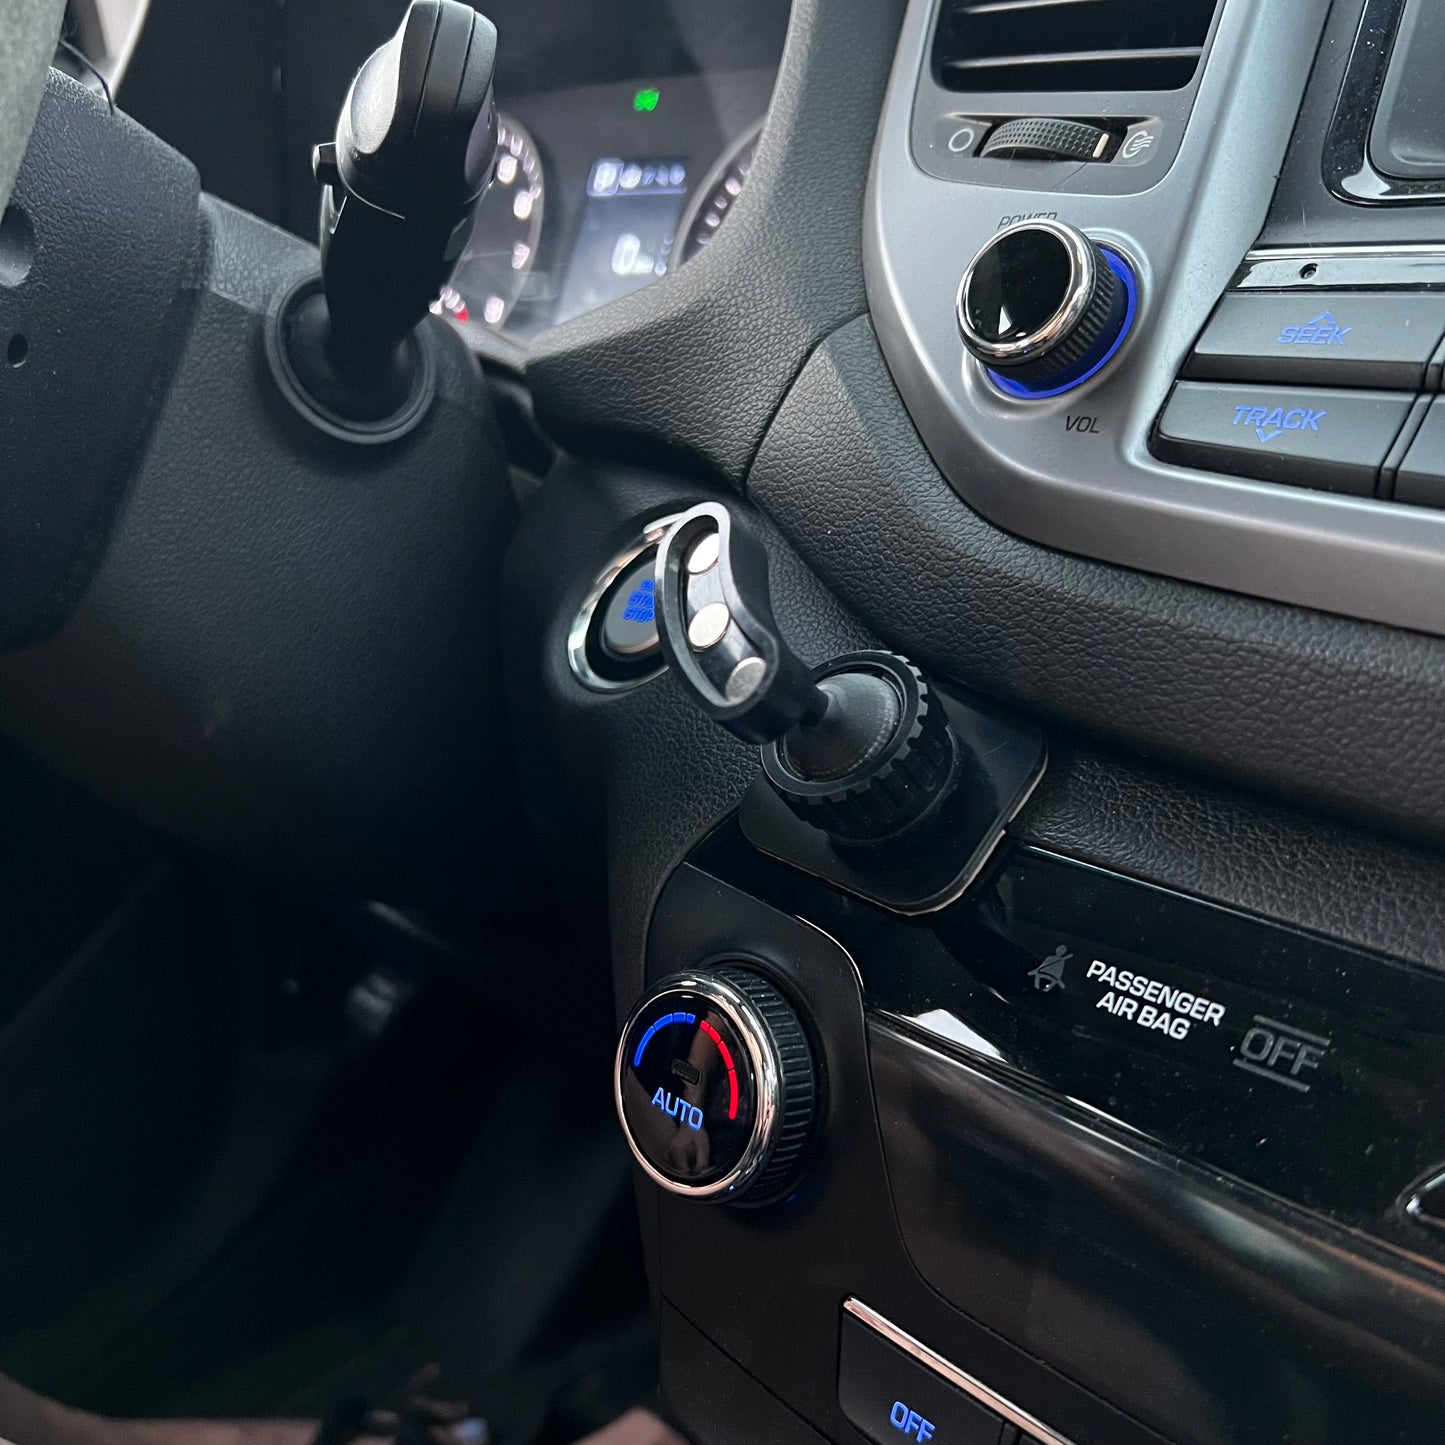
Our car mount features a compact and durable plastic base measuring 1.5 inches by 2 inches. Equipped with a strong adhesive tape, the mount can be easily attached to any flat surface on your car's dashboard or windshield. Our ball socket design allows you to twist and maneuver the attachment to the position of your liking.
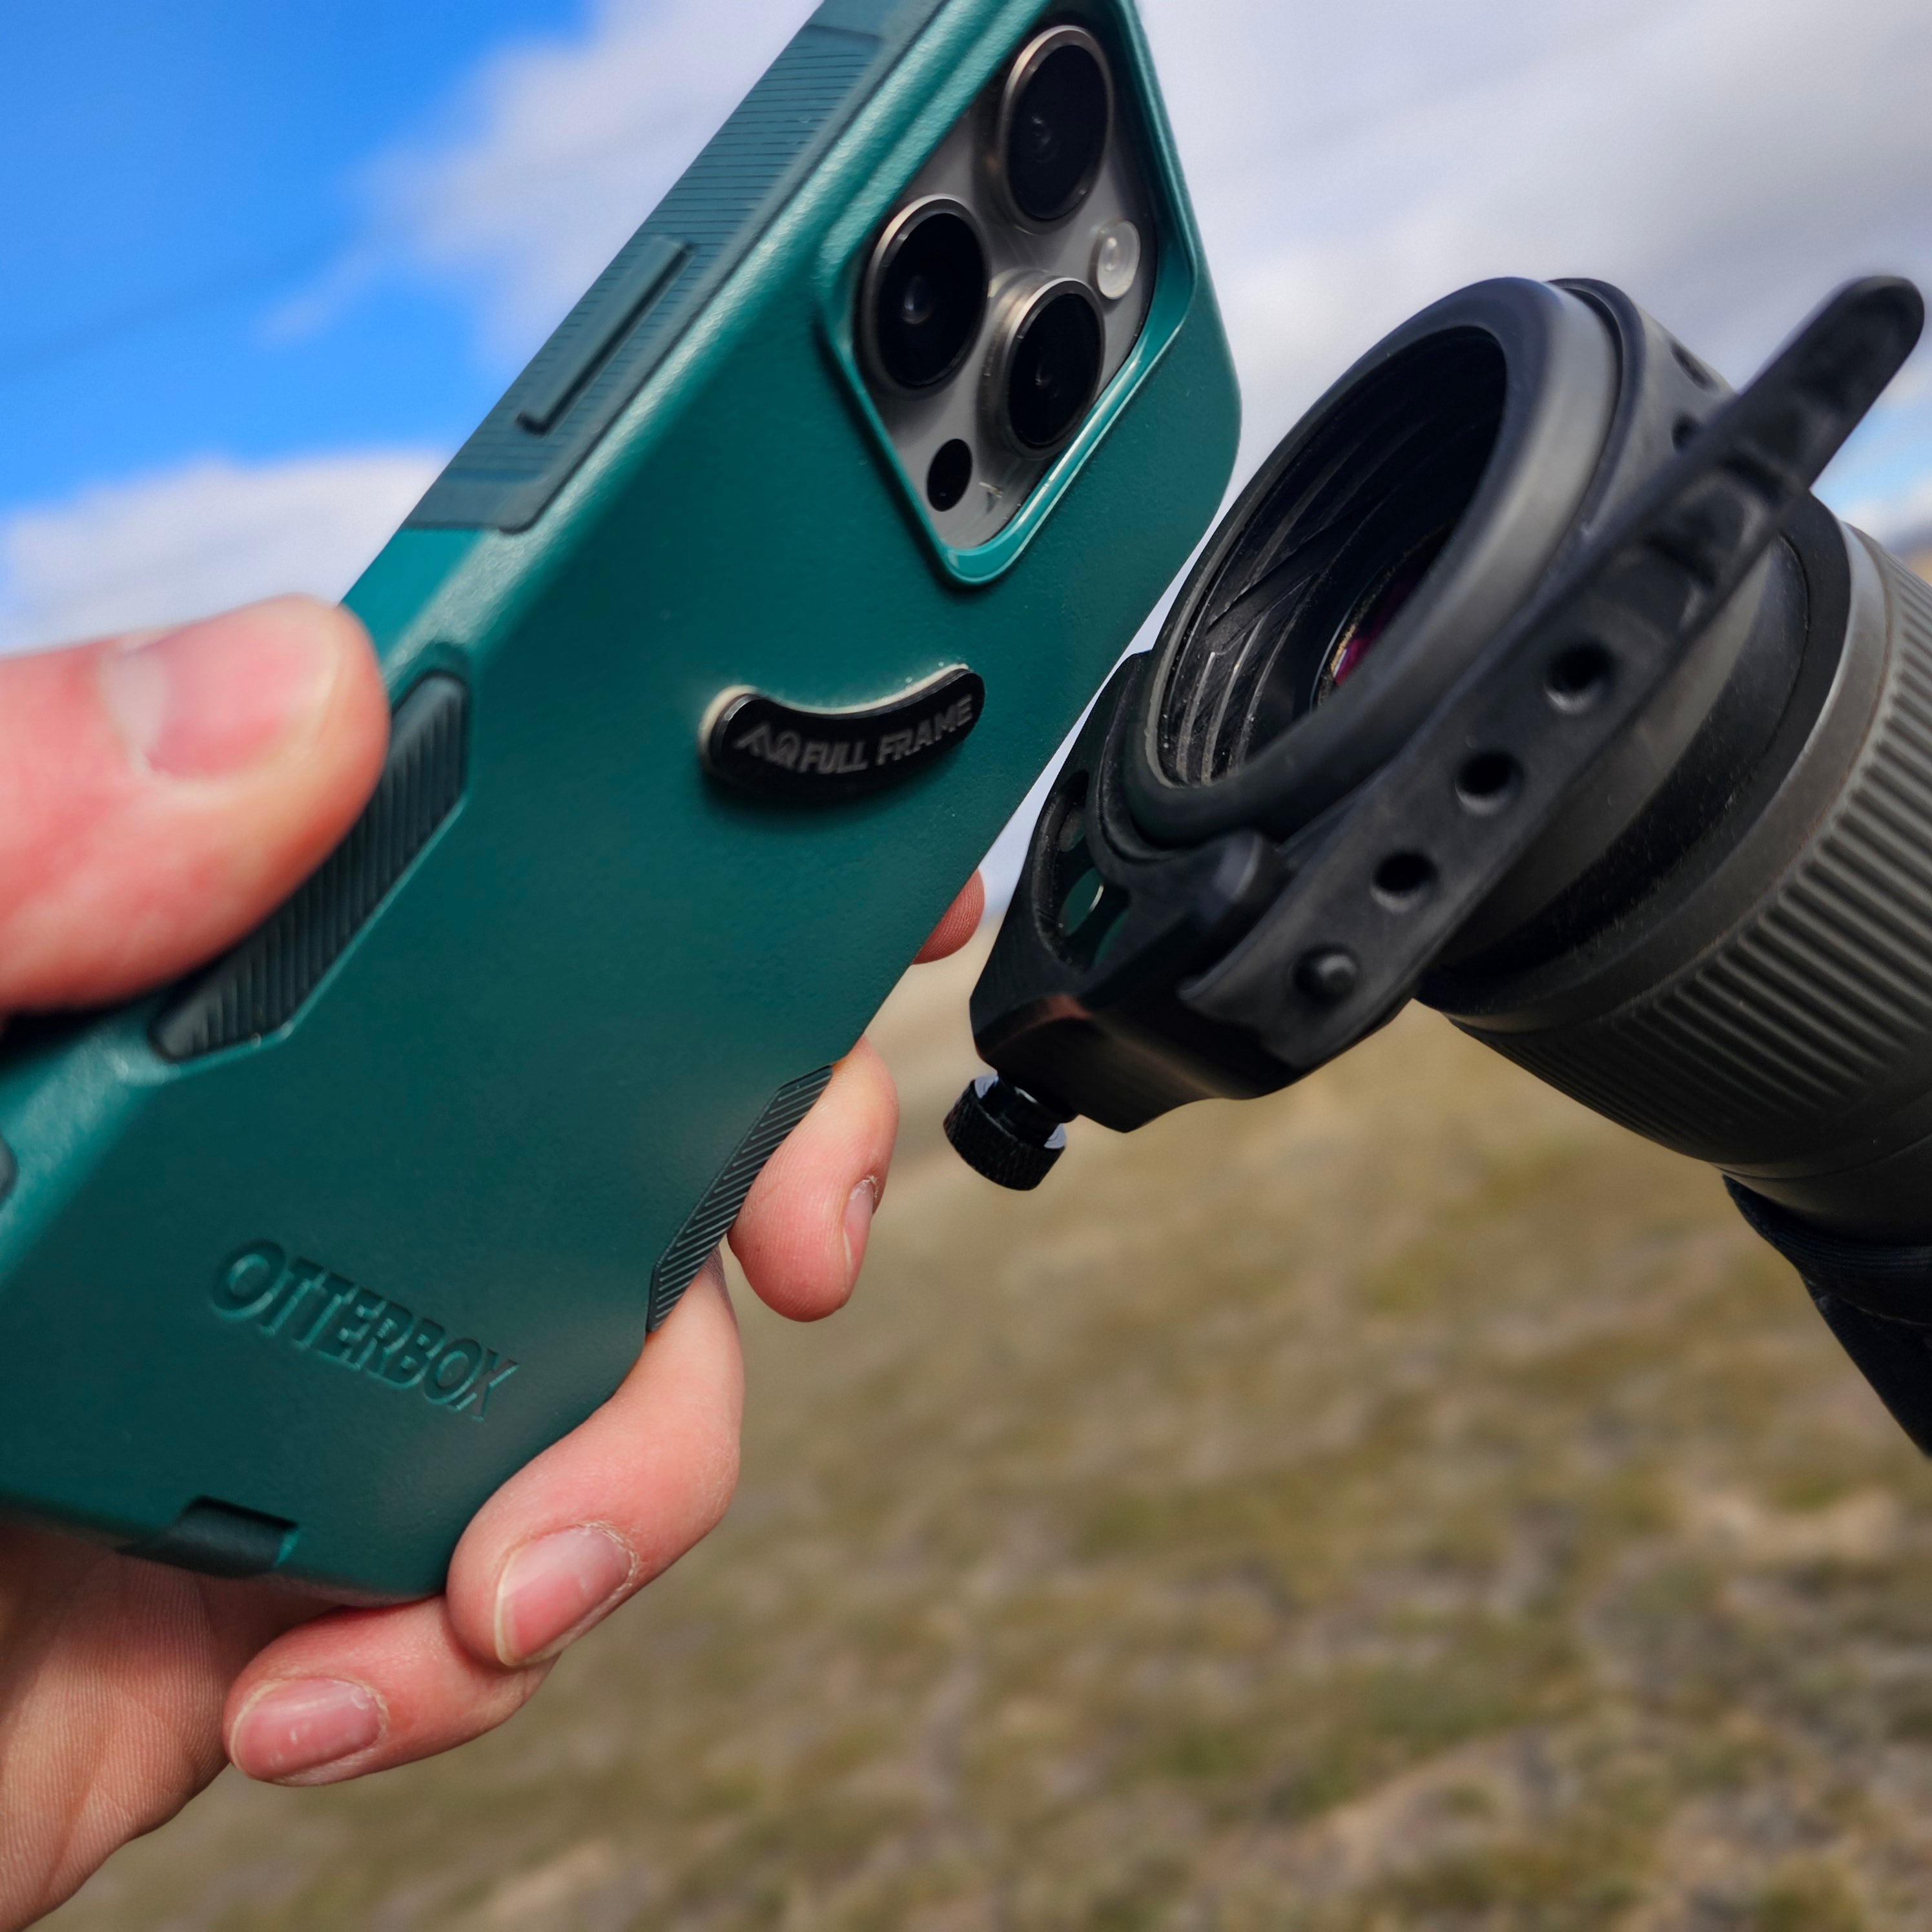
We specifically designed this product to be compatible with our digiscoping adapter, which makes it the perfect add-on accessory for the Nanner which is already on your phone case. It's a win-win.
Important Notes:
- Before purchasing, please inspect your car's interior to identify a suitable flat surface that can accommodate the mount's dimensions. Not all vehicles have ideal mounting locations, so careful consideration is recommended to ensure optimal performance.
- If you are only purchasing the car mount attachment have not purchased a Digiscoping adapter in the past/are not including one on your order, be sure to add the Alignment Tool & Nanner Clip to your order! You will need the Nanner clip to attach to your phone case to use our car mount attachment.
What sets us apart?
Our innovative digiscoping system allows you to use your own phone case, which means you can easily clip your phone into our magnetic car mount using the same Nanner clip you use to attach it to your spotter or binoculars. This unique feature offers unparalleled versatility and convenience, making our products a must-have for outdoor enthusiasts.
Unlike other digiscoping companies, we've designed a system that integrates seamlessly with your existing gear.
No need to invest in additional accessories or replace your favorite phone case. With our all-in-one solution, you can effortlessly switch between your spotting scope, binoculars, and hands-free navigation, all with a single clip.
Product Installation FAQ
Cheek Riser Installation
- Position the Cheek Riser on the rifle stock for optimal cheek weld comfort. Ensure it's placed far enough back to allow for bolt removal without needing to uninstall the riser.
- Mark the screw hole location. While the riser is placed in your predetermined optimal position, pre-drill a pilot hole in the stock using a 1/8" drill bit.
- Insert the screw. Tighten snugly but do not overtighten.
Note: If you do not want to drill a hole into your stock, you can use double-sided 3M tape in place of the provided screw.
Vertical Grip Installation
- If a Tikka vertical grip is on your rifle, you can remove it by loosening and extracting the hex bolt. (Please keep this original hex bolt)
- Align and place the Full Frame Vertical Grip in the mounting position.
- Insert the original Tikka hex bolt into the Full Frame Vertical Grip and tighten. Ensure a firm fit without stripping threads.
Bag Rider Installation
- Remove the butt pad screws and sling stud screw from the rifle stock.
- Position the Bag Rider between the butt pad and stock.
- Reinstall the butt pad using the original screws, sandwiching the Bag Rider in place.
- Replace the sling stud with the larger screw that we provided. Tighten securely.
NOTE: This kit includes a Cheek Riser that may require drilling a hole into the factory stock. Modifying your rifle should be done with care using proper tools. Full Frame Outdoors is not responsible for damage, voided warranties, or injury resulting from improper installation or misuse of this product. If you are not comfortable drilling into your stock, please have a qualified gunsmith perform the installation.